
Black Widow – Wax Injection
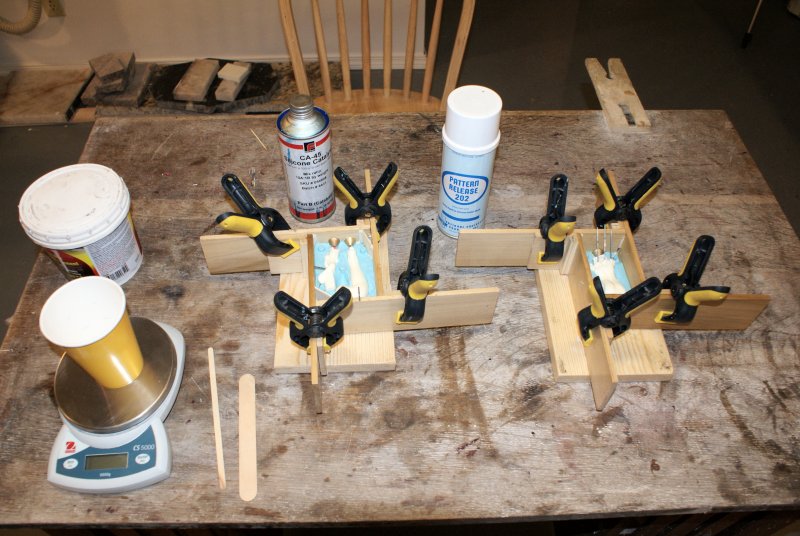
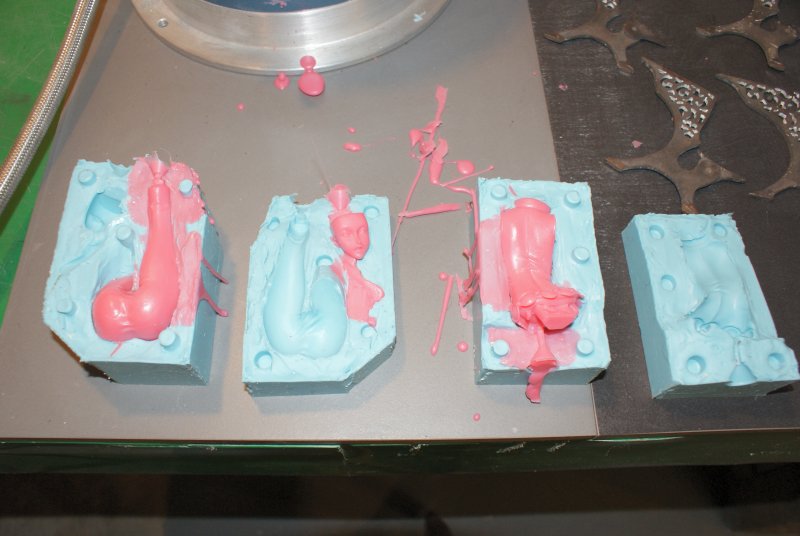
Here are a few pictures of the second half of my two part mould. The next day after the first half is set I unstick them from the base, turn them over, and remove the modelling clay. The forms are repositioned and the second half of silicon rubber is measured and poured.
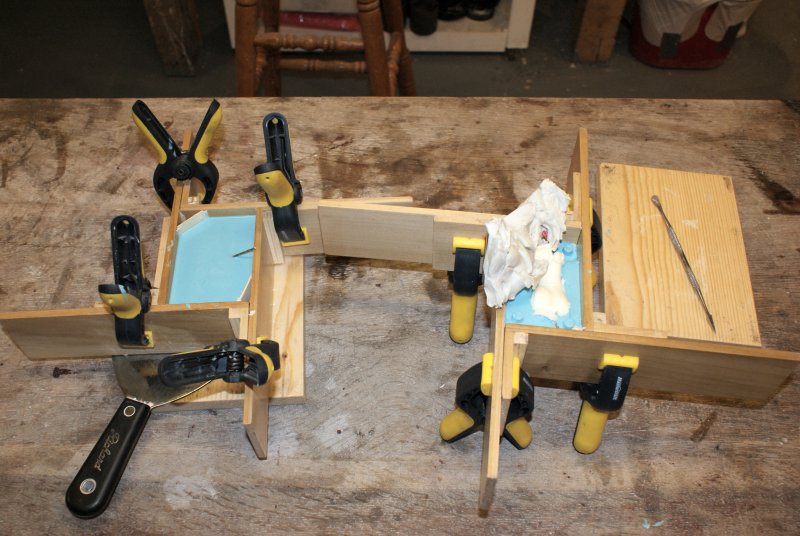
The real trick here is to remember to spray or paint the first part of the mould with a silicon rubber release agent before you pour the second half. Silicon rubber doesn’t stick to most things, but it does stick exceedingly well to itself. If you don’t use a release agent in between you won’t be able to pull the halves apart. I think the release agent is essentially a spray version of Vaseline, but it is best to use the rubber manufacturer recommended product. I use Freeman’s Pattern Release 202 product.
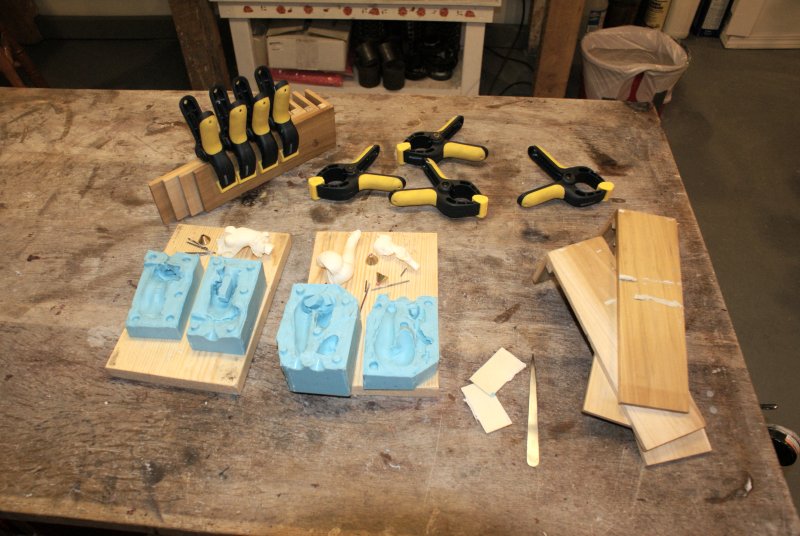
The next day after the second half is set and cured you can pull the moulds apart and remove the resin parts. Oh, by the way, those bronze cones in the moulds that you see throughout this are injector nozzle forms. This is where the wax is injected into the mould.
My wax injector is a 1 quart capacity vessel that can be heated to 165 F and pressurized up to about 15 pounds of air pressure. The silicon mould is clamped between a few pieces of wood, or even my mould box frames, to stop the mould from deforming when injected with pressurized wax. You push the silicon rubber mould up against the injector nozzle and this releases the molten wax into the mould. There are various types of injection waxes that you can buy. The pink one that I am using now is hard enough such that when cool I can sand and work with it if I need to, after the part is made.
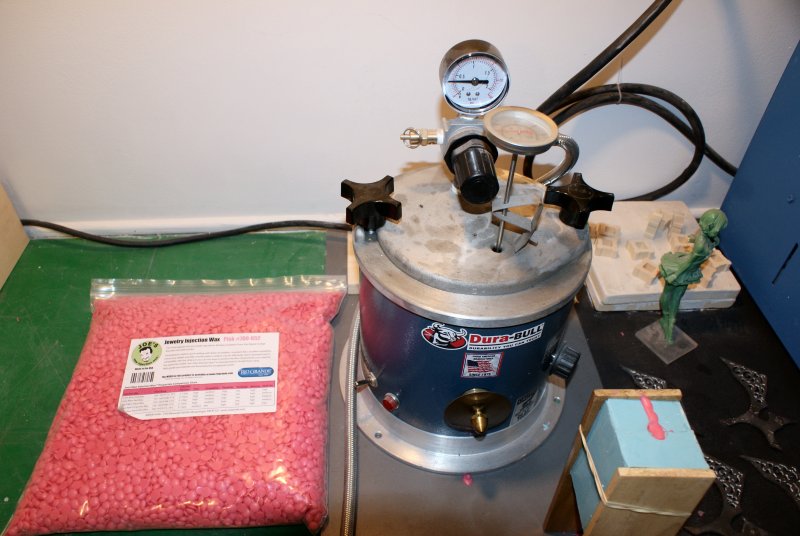
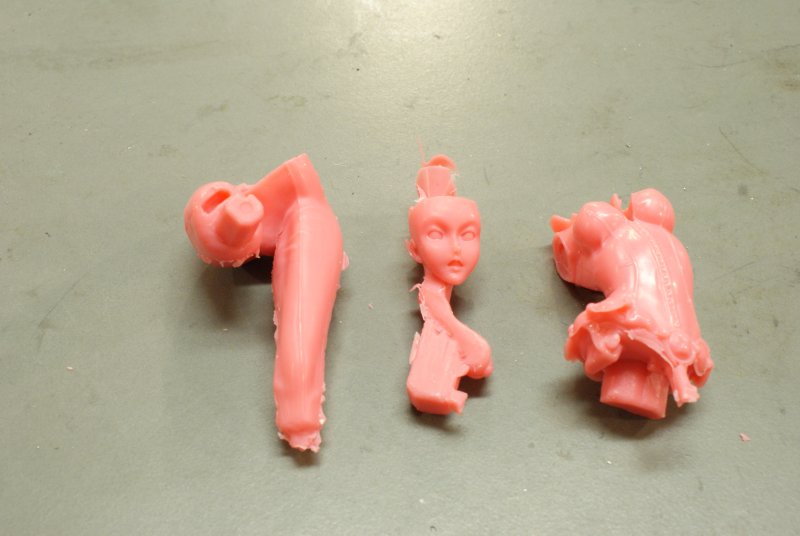
You can see that these wax replicas of the parts are quite good and contain lots of detail. Sometimes the wax doesn’t always fill the mould, particularly if it is not vented properly, but that’s not a problem as I can always inject more wax and try again. Sometimes, too, the wax may have internal cavities where it didn’t fill completely. This can cause problems when casting, so I have to watch for this.
Once I have the parts in wax I can then start to work with the wax and assemble parts and sculpt things as necessary before I cast. I will show you this later.
It will be a few days before I will post new work as I have to create silicone rubber moulds for all the rest of the kit parts. So, hang tight, the story will continue in a bit …


No comments yet.